The secret to unlocking incredible flavour from cheap cuts isn’t a complex recipe; it’s mastering the simple science of transforming tough connective tissue into succulent, meltingly tender meat.
- Low temperature (around 110°C) is non-negotiable for converting collagen into gelatin.
- Resting the meat after cooking is as crucial as the cook itself for ensuring a juicy result.
Recommendation: Focus on temperature control and patience. A cheap cut cooked with correct technique will always outperform an expensive one cooked poorly.
The butcher’s counter can be a daunting place. On one side, the prime ribeyes and fillets, gleaming under the lights with a price tag to match. On the other, the humble brisket and shoulder—cuts that promise great value but often deliver tough, disappointing results in the home kitchen. Many home cooks, trying to save money, have been let down by a dry pork shoulder or a chewy brisket, leading them to believe flavour is a luxury they can’t afford.
The common advice is always the same: “just cook it low and slow.” But this advice is incomplete. It’s the “why” and “how” that truly matter. You might have tried marinades or different cooking times with little success. The issue isn’t your effort; it’s the lack of understanding of what’s happening inside that piece of meat. These cuts are packed with connective tissue and collagen, which become tough and rubbery when cooked quickly but transform into luscious, flavourful gelatin with the right application of time and temperature.
But what if the key wasn’t a secret ingredient, but a secret process? This guide moves beyond generic advice to give you a chef’s perspective. We’ll explore the science of collagen conversion, the critical importance of resting, and how to build layers of flavour before the meat even sees the heat. We’re not just following steps; we’re learning the craft of nose-to-tail cooking to make every cut, no matter the price, a tender, celebratory feast.
This article will walk you through the essential techniques and scientific principles that chefs use to transform economical cuts into five-star dishes. From understanding the magic of low-temperature cooking to the perfect accompaniments, you’ll gain the confidence to tackle any cut.
Summary: Brisket and Shoulder: A Chef’s Masterclass in Tenderness
- Low and Slow: Why You Need to Cook Pork Shoulder at 110°C for 8 Hours?
- The Resting Rule: Why Cutting Meat Too Soon Ruins a Slow Roast?
- Crockpot vs Oven: Can You Get Crispy Skin in a Slow Cooker?
- Dry Rub vs Wet Marinade: Which Is Better for Lamb Shoulder?
- Acid and Crunch: Why You Need Pickles with Fatty Slow-Roast Meats?
- Dry-Aged vs Wet-Aged: Which Method Produces the Most Tender Ribeye?
- Celeriac and Chard: What to Cook with the “Weird” Veg in Your Box?
- Why Is Aged Yorkshire Beef Worth the Extra £10 Per Kilogram?
Low and Slow: Why You Need to Cook Pork Shoulder at 110°C for 8 Hours?
The phrase “low and slow” is the cornerstone of cooking tough cuts, but the specific numbers are what matter. Cooking a pork shoulder or brisket at 110°C for many hours isn’t about guesswork; it’s about targeting a specific biological process. These cuts are rich in connective tissue, primarily made of a protein called collagen. When heated quickly, collagen contracts and becomes tough—the reason a flash-fried piece of brisket is inedibly chewy.
However, when held in a “magic window” of temperature—typically between 70°C and 95°C—that tough collagen begins a remarkable transformation. It slowly breaks down and converts into gelatin, a rich, viscous protein that lubricates the muscle fibres and gives slow-cooked meat its succulent, fall-apart texture. An oven set to 110°C creates the perfect gentle environment to hold the meat in this conversion zone for hours without drying it out. This is where patience pays off. During this long cook, you might notice the temperature “stall” for a long period; this is normal and is the phase where the most intense collagen breakdown and evaporative cooling happens.
The time required varies by weight, but a good rule of thumb for brisket is to expect, according to BBQ experts, 1 to 1.25 hours per pound (or roughly 2.5 hours per kilogram) at this temperature. For a truly professional result, always cook with the fat cap facing up. As it renders, the fat bastes the meat continuously, adding flavour and moisture throughout the long cooking process. You know it’s ready not by time, but by feel: a temperature probe should slide into the meat with almost no resistance, like probing softened butter.
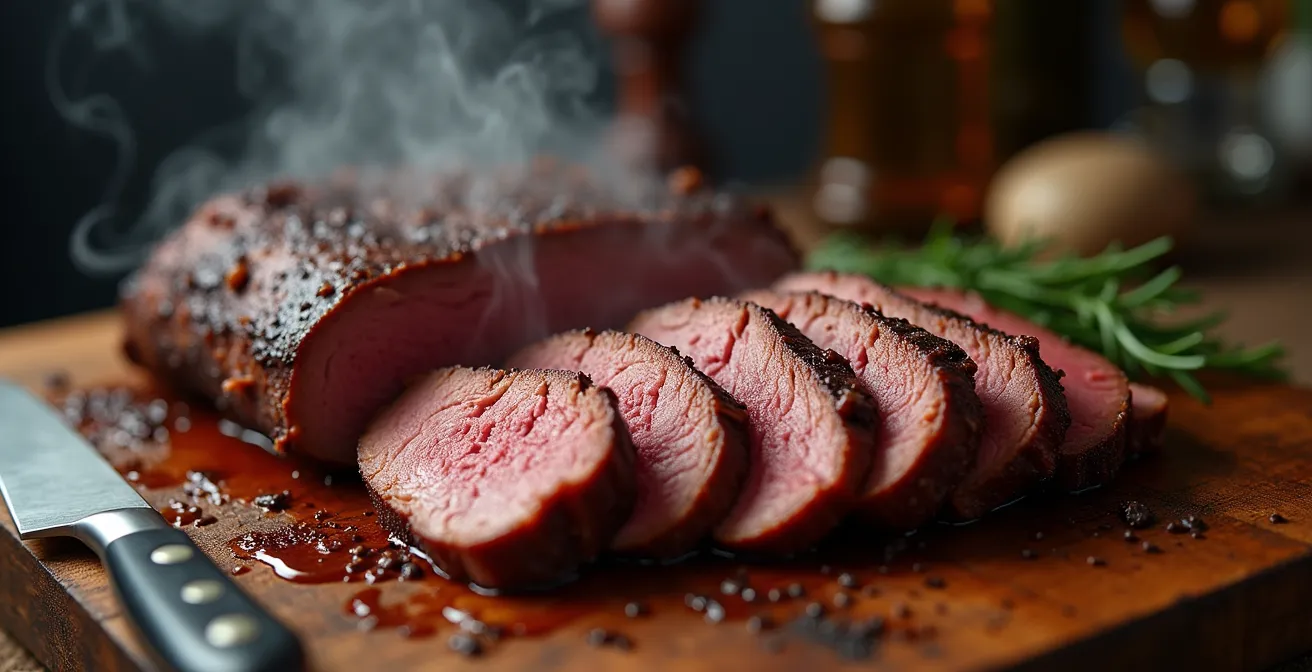
The Resting Rule: Why Cutting Meat Too Soon Ruins a Slow Roast?
You’ve been patient for eight hours, the house smells incredible, and the roast looks perfect. The temptation to slice into it immediately is immense, but this is the final, crucial test of a cook’s discipline. Cutting into meat straight from the oven is the single fastest way to undo all your hard work. During cooking, the muscle fibres in the meat constrict, squeezing their natural juices toward the centre. If you slice it open now, those free-flowing juices will pour out onto your cutting board, leaving the meat dry and disappointing.
Resting allows for juice redistribution. As the meat gradually cools, the muscle fibres relax and reabsorb the moisture, locking it within the meat. This ensures that every single slice is succulent and flavourful. Professional pitmasters treat the rest as a non-negotiable part of the cooking process. For a large cut like a brisket or pork shoulder, a rest of at least one hour is standard, and many professionals will rest theirs for two to four hours, wrapped tightly in butcher paper or foil and kept in an insulated cooler. This holds the meat at a safe, warm temperature while allowing the magic of redistribution to happen.
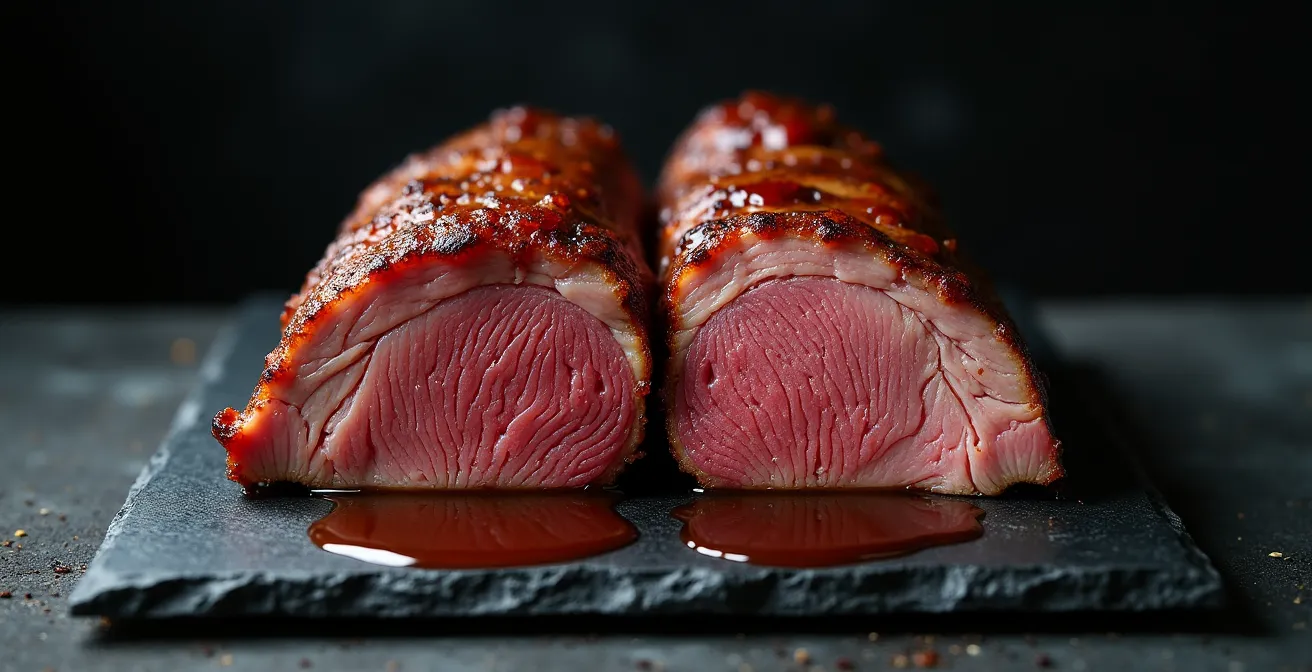
As this image demonstrates, a properly rested slice holds its moisture, appearing glossy and tender. Once rested, the final piece of the puzzle is slicing correctly. Always identify the direction of the muscle fibres (the grain) and slice directly against them. This shortens the fibres, making the meat feel exponentially more tender in the mouth. For a cut like brisket, which has two different muscles with grains running in different directions (the flat and the point), it’s common to separate them after resting and slice each one individually against its grain.
Crockpot vs Oven: Can You Get Crispy Skin in a Slow Cooker?
For convenience, the slow cooker, or Crockpot, is a home cook’s best friend. It offers unparalleled “set it and forget it” ease, maintaining a low, stable temperature for hours, which is perfect for collagen breakdown. However, it achieves this with moist heat in a sealed environment. This is both its greatest strength and its primary weakness. While it produces exceptionally moist, tender meat, it is completely incapable of creating the crisp, browned, flavourful exterior—the “bark” on a brisket or the crackling on a pork shoulder—that many people crave.
A Dutch oven used in a conventional oven provides a drier heat environment. This allows for the Maillard reaction and caramelisation on the surface of the meat, building a deep, savoury crust. While it requires a bit more attention than a slow cooker, the flavour payoff is significant. Many recipes for a Dutch oven call for an initial sear on the stovetop to kickstart this browning process before the long, slow braise in the oven.
So, must you choose between convenience and flavour? Not at all. The best approach is often a two-stage hybrid method that leverages the strengths of both. You can perform the long, slow cook in the Crockpot for 6-8 hours until the meat is perfectly tender—with some chefs recommending 8-10 hours on a LOW setting for ultimate tenderness. Then, carefully transfer the meat to a roasting pan and place it in a very hot oven (around 220°C) for 15-20 minutes. This final blast of dry heat is all it takes to crisp up the skin and create a beautiful, delicious crust, giving you the best of both worlds.
This comparison from a recent analysis by The Kitchn breaks down the trade-offs clearly.
| Method | Moisture Retention | Crackling Potential | Cook Time |
|---|---|---|---|
| Slow Cooker Only | Excellent | None | 6-8 hours LOW |
| Dutch Oven | Very Good | Yes (initial sear + final crisp) | 5-6 hours at 150°C |
| Two-Stage (Slow Cooker + Oven) | Excellent | Perfect (20 min hot finish) | 6-8 hours + 20 min |
Dry Rub vs Wet Marinade: Which Is Better for Lamb Shoulder?
When preparing a cut like lamb shoulder, the first instinct for many is to reach for a wet marinade, believing it will tenderise and flavour the meat deeply. The truth, however, is that marinade molecules are too large to penetrate more than a few millimetres into the meat. While they are excellent for flavouring the surface, their tenderising effect is minimal. The real key to a tender lamb shoulder is the cooking process itself, not the marinade.
This is why many chefs and BBQ pitmasters prefer a dry rub combined with a technique called dry-brining. Dry-brining simply involves salting the meat generously (about 1 teaspoon of kosher salt per pound) and letting it rest uncovered in the fridge for 24-48 hours. The salt initially draws moisture out, but this moisture then dissolves the salt and is reabsorbed into the meat, seasoning it far more deeply than a wet marinade ever could. After dry-brining, you can apply your dry rub—a mixture of spices like cumin, coriander, paprika, garlic powder, and black pepper. When cooked, this rub forms a flavourful, textured crust known as “bark.”
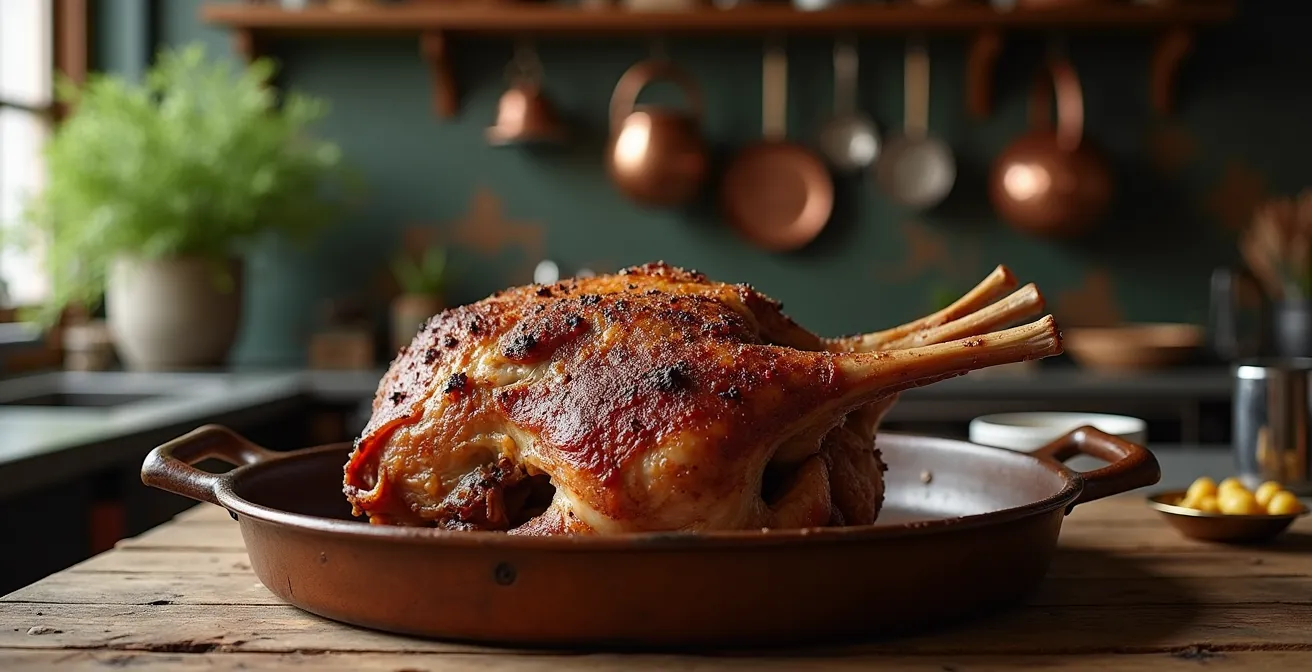
A popular professional trick is to slather the meat in a thin layer of simple yellow mustard before applying the rub. The mustard itself is not tasted in the final product, but its moisture helps the rub adhere, and its mild acidity helps in the initial stages of bark formation. While a traditional British Sunday Roast might favour a simple rub of rosemary, garlic, and lemon, modern palates in the UK have increasingly embraced more complex, Middle Eastern-inspired spice profiles that create a truly spectacular crust, as shown above.
Acid and Crunch: Why You Need Pickles with Fatty Slow-Roast Meats?
After hours of slow-roasting, you have a rich, unctuous, and incredibly flavourful piece of meat. But richness can quickly become overwhelming, leading to a phenomenon chefs call “palate fatigue.” This is when your taste buds become saturated with a single flavour profile—in this case, fat and umami—making each subsequent bite less enjoyable. The solution isn’t to make the meat less rich, but to serve it with something that provides contrast.
This is the essential role of acidity and crunch. A sharp, acidic element, like a pickle or a vinegar-based slaw, cuts through the fat and cleanses the palate, making the next bite of meat taste just as good as the first. The acetic acid in vinegar is particularly effective at breaking through lipids. As a study of traditional pairings by professional chefs at Once Upon a Chef shows, this is why classic British accompaniments like sharp Piccalilli, tangy pickled walnuts, or a sweet-and-sour apple cider chutney are such perfect partners for fatty roasts. The textural contrast of a crunchy pickle or raw onion against the meltingly tender meat is equally important, creating a more dynamic and satisfying eating experience.
You don’t need to rely on store-bought jars. Making your own quick pickles is incredibly simple and allows you to control the flavour. Quick-pickled red onions, with their vibrant pink hue and sharp bite, are a classic for a reason.
Your Action Plan: Quick British Pickled Red Onions
- Slice 2 red onions thinly into half-moons and pack them into a clean jar.
- Gently heat 250ml of malt vinegar with 2 tablespoons of sugar in a small pan until the sugar is fully dissolved.
- Pour the hot vinegar mixture over the onions in the jar.
- Add 1 teaspoon of salt and an optional bay leaf for extra flavour.
- Seal the jar and let it stand for at least 30 minutes before serving. They will keep in the refrigerator for up to 2 weeks.
Dry-Aged vs Wet-Aged: Which Method Produces the Most Tender Ribeye?
While our focus is on making cheap cuts tender, it’s useful to understand how expensive cuts get their famous texture. When you see “aged” on a menu, it typically refers to one of two processes: wet-aging or dry-aging. Wet-aging is the modern standard, where meat is vacuum-sealed in plastic and aged for a few days or weeks. This process prevents moisture loss, so the butcher sells the same weight they bought. It tenderises the meat to a degree, but the flavour remains purely “beefy.”
Dry-aging, however, is a much more traditional and transformative process. The meat is aged in a carefully controlled environment with regulated temperature, humidity, and airflow for anywhere from 21 to over 100 days. During this time, two things happen. First, natural enzymes within the meat break down tough muscle fibres, resulting in profound tenderness. Second, the meat loses a significant amount of water through evaporation. This moisture loss, which can be up to 30% of the original weight, concentrates the beef’s flavour, developing complex, nutty, and almost cheese-like notes. The exterior of the meat develops a hard, dry crust which must be trimmed off, resulting in further weight loss.
This combined loss of weight and the expertise required is why dry-aged beef is so much more expensive. For a cut like a ribeye, where tenderness is already a given, dry-aging is all about maximising flavour. When talking to a good British butcher, you can ask specific questions to ensure you’re getting true quality:
- Ask for beef that has been dry-aged for at least 35 days to ensure proper flavour development.
- Inquire about the breed; native British breeds like Longhorn, Shorthorn, or Aberdeen Angus are prized for their flavour and marbling.
- Look for a deep, dark red colour and a slightly dry exterior.
- For American-style BBQ, ask for the “packer cut” of brisket, which includes both the flat and point muscles.
Celeriac and Chard: What to Cook with the “Weird” Veg in Your Box?
A great piece of meat deserves equally great sides, and often the most interesting pairings come from the less common vegetables you might find in a weekly veg box. Celeriac and chard, for example, can seem intimidating but are incredibly versatile and pair beautifully with rich, slow-cooked meats like brisket or lamb shoulder.
Celeriac, with its nutty and subtly celery-like flavour, is a fantastic alternative to potatoes. Instead of a standard mash, try treating it like a steak. By cutting it into thick 2cm rounds, brushing with olive oil and thyme, and roasting at a high heat, you create Roasted Celeriac ‘Steaks.’ They become beautifully caramelised on the outside and tender on the inside, providing a perfect base for a pile of shredded lamb, ready to soak up all the delicious juices.
Chard is another zero-waste hero in the kitchen. The common mistake is to treat the stems and leaves the same way. The tough stems need more cooking time. A brilliant chef’s technique is to braise the chopped stems with some garlic and bacon (or a splash of smoked oil) until tender, then simply wilt the delicate leaves into the mixture at the very end. This creates a side dish with varied textures that perfectly complements the richness of beef brisket. It’s a “root-to-leaf” approach that respects the ingredient and your budget.
Action Plan: Auditing Your “Weird” Veg
- Identify Parts: List the different components of the vegetable (e.g., chard has a tough stem and a tender leaf; fennel has a bulb, stalks, and fronds).
- Assess Texture: Determine which parts are tough and need longer cooking (roasting, braising) and which are tender and need minimal cooking (wilting, raw garnish).
- Flavour Profile: Taste a small raw piece. Is it earthy (beetroot), anise-like (fennel), or peppery (radish tops)? Match this to your main dish.
- Technique Matching: For tough parts, consider roasting, braising, or pickling. For tender leaves and herbs, think salads, pestos, or finishing garnishes.
- Integration Plan: Decide how to use each part. Example: Roast celeriac root, braise chard stems with the meat, and use fennel fronds as a final fresh garnish.
Key Takeaways
- True tenderness in cheap cuts comes from converting collagen to gelatin, which requires holding the meat between 70-95°C for many hours.
- Resting meat for at least an hour is non-negotiable; it allows juices to redistribute for maximum moisture.
- Dry-brining with salt 24 hours in advance seasons meat more deeply than any wet marinade can.
- Balance rich, fatty meats with acidic and crunchy accompaniments like pickles to prevent palate fatigue and elevate the meal.
Why Is Aged Yorkshire Beef Worth the Extra £10 Per Kilogram?
In a guide focused on saving money, it might seem strange to end on a discussion about expensive beef. But understanding what you’re paying for is the ultimate mark of a confident cook. When you see a piece of aged Yorkshire beef with a price tag of £10 or more per kilogram above a standard supermarket cut, you’re not just paying for a piece of meat; you’re investing in a chain of quality, expertise, and, most importantly, flavour.
The concept of terroir, often used for wine, applies here. The unique grasses and limestone-filtered water of the Yorkshire Dales impart a distinct flavour to native breeds that cannot be replicated elsewhere. That extra cost covers the farmer’s commitment to sustainable practices and raising these heritage breeds. It then covers the butcher’s art of dry-aging—a process where, as we’ve seen, up to 30% of the initial weight is lost to evaporation, concentrating the flavour into something truly extraordinary. You are paying for the water that has been removed to make the beef taste more like beef.
This investment is an acknowledgement of craftsmanship. It’s the understanding that the time, care, and expertise from the farm to the butcher’s block all contribute to the final product on your plate. While the techniques in this guide will make any cheap cut taste amazing, applying them to a truly exceptional piece of raw material elevates the experience to another level. It’s a choice you make not for every day, but for an occasion when you want to celebrate the very best of British farming and butchery. It transforms cooking from a simple necessity into an appreciation of a craft.
Now that you have the chef’s playbook, the next step is to head to your local butcher with confidence. Start applying these techniques to turn a simple shoulder or brisket into a meal your family and friends will be talking about for weeks.