In summary:
- Forget trying to perfectly simulate hills; focus on building resilience to the chaos of UK terrain.
- Strengthen your ankles with targeted urban drills to prevent injury on uneven, root-covered ground.
- Ditch your GPS pace. True cross-country racing is about effort and competing against the person next to you.
- Your choice of spike length (12mm or 15mm) is more critical than your brand of shoe for handling British mud.
- Use legal access rights (CRoW Act) and targeted treadmill sessions to build climbing power, even in a city.
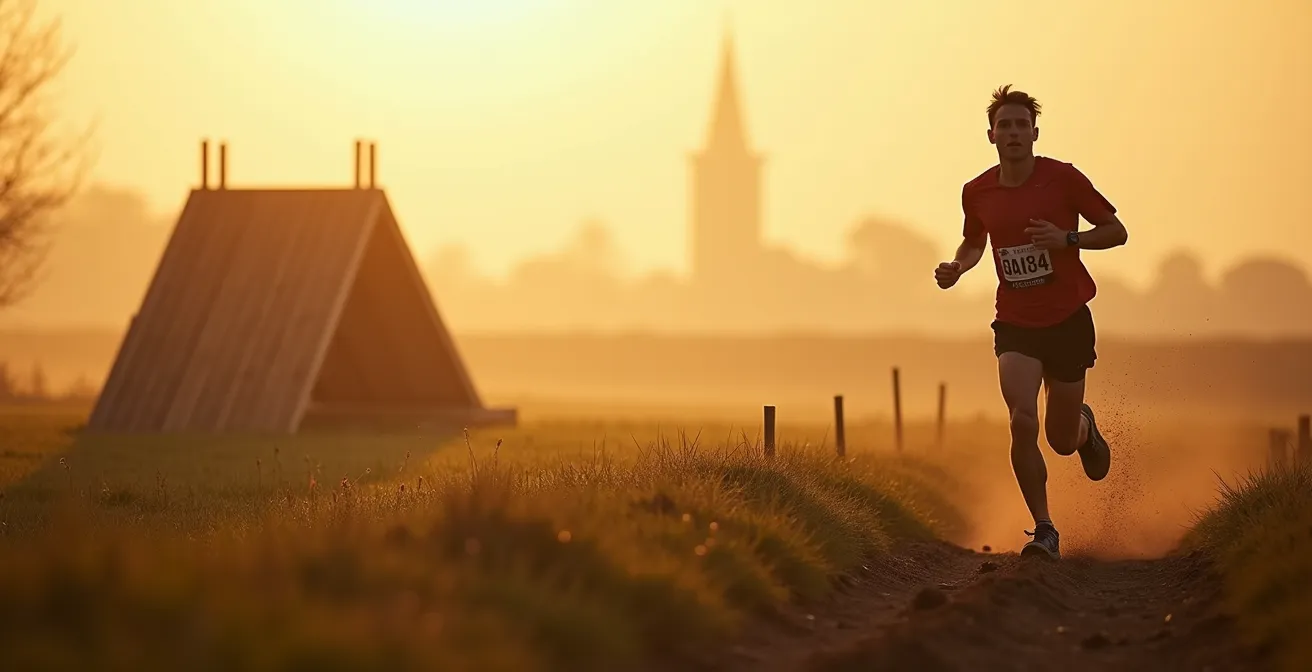
You’ve done it. You’ve signed up for your first cross-country race. The confirmation email sits in your inbox, a mix of excitement and rising panic. The course description mentions “undulating terrain,” “challenging climbs,” and “potential for significant mud.” You look out of your city-centre flat window at the pancake-flat park opposite and a cold dread sets in. How on earth do you prepare for the brutal reality of a British cross-country course when your daily run is on perfectly paved, level ground?
The standard advice you’ll find online is predictable: hit the treadmill incline, do some squats, find a multi-storey car park. While not entirely wrong, this advice misses the fundamental truth of UK cross-country. The challenge isn’t just the gradient of the hills; it’s the unpredictable chaos of the terrain underfoot. It’s the ankle-twisting roots hidden in the woods, the energy-sapping deep mud, the frantic elbow-to-elbow start, and the complete irrelevance of your GPS watch.
But what if the key wasn’t about finding a perfect hill substitute? What if, instead, you could weaponise your urban environment to build the specific, rugged resilience needed to thrive in those conditions? This isn’t a guide about finding hills. It’s a practical, no-nonsense coaching plan for forging a body and mind that can handle the specific demands of UK cross-country, turning your biggest disadvantage—a lack of hills—into a focused training strategy.
This guide will walk you through the essential components of that strategy, from choosing the right gear for treacherous ground to developing the unique physical and mental skills that separate seasoned cross-country runners from the rest. We’ll cover everything you need to stand on that start line with confidence, ready for whatever the course throws at you.
Summary: A City Runner’s Guide to Conquering UK Cross-Country
- Spikes or Trail Shoes: Which Grip Is Best for Deep Mud and Tree Roots?
- Proprioception Drills: How to Strengthen Ankles for Rugged Terrain?
- Why You Should Ignore Your GPS Watch Pace During a Cross-Country Race?
- How to Wash Mud-Caked Running Shoes Without Destroying the Glue?
- The Warm-Up Mistake: Why You Get Cold on the Start Line?
- Footpath vs Open Access Land: Where Can You Legally Walk?
- Zone 2 Cardio: Why Brisk Walking Is Enough for Heart Health?
- How to Hike in the Cotswolds AONB Without Contributing to Erosion?
Spikes or Trail Shoes: Which Grip Is Best for Deep Mud and Tree Roots?
Let’s get the most critical gear choice out of the way first. In the context of a typical British cross-country race, your footwear isn’t about cushioning or brand; it’s about one thing: grip. Forget your road shoes. Even your standard trail shoes might not cut it when faced with the deep, cloying mud of a northern forest course in November. The debate boils down to aggressive trail shoes versus cross-country spikes, and for 90% of UK courses, spikes are the superior weapon.
Trail shoes offer better underfoot protection and are more versatile, but their lugs can clog with thick mud, turning them into slippery slicks. Spikes, on the other hand, are designed to dig deep into soft ground, providing reliable traction where it matters most. The key is selecting the right length. While options range from 6mm to 15mm, the ‘British Standard’ for typical UK conditions recommends spikes from 12mm to 15mm in length. These longer spikes are essential for cutting through the top layer of churned-up mud to find purchase on the firmer ground beneath.
A venue like London’s Parliament Hill, famous in the UK cross-country scene, perfectly illustrates this. Its course features a mix of firm paths, grassy inclines, and notoriously muddy sections. Here, a 12mm spike often provides the best compromise. However, for races known for being complete mud-baths, upgrading to 15mm is a race-day decision that can save you from spending more time on your backside than on your feet.
This table gives you a practical framework for making that choice, based on real UK course conditions.
| Spike Length | Terrain Conditions | UK Course Examples |
|---|---|---|
| 9mm | Firm, dry ground | Early season races, South Downs chalk |
| 12mm | Mixed terrain, moderate mud | Most UK conditions, Parliament Hill standard sections |
| 15mm | Deep mud, soft ground | Northern forest courses, wet winter conditions |
Ultimately, investing in a pair of cross-country spikes and a couple of sets of different length pins is a small price to pay for the confidence and security you’ll feel on a treacherous course. It is the single most important gear decision you will make.
Proprioception Drills: How to Strengthen Ankles for Rugged Terrain?
If spikes are your weapon for gripping the ground, then strong, responsive ankles are your armour. The biggest danger on a wooded, root-strewn course isn’t the hills; it’s a rolled ankle from an unseen hazard. Proprioception is your body’s awareness of its position in space, and training it is non-negotiable for a cross-country runner. It’s the neurological skill that allows your foot to land on an angled tree root, instantly stabilise, and push off without a moment’s hesitation or injury. And the good news is, you can build bomb-proof ankles right in the middle of the city.
Forget the pristine gym floor. Your urban environment is a perfect, if unconventional, training ground. The goal is to introduce controlled instability to your daily routine, teaching your ankles to react instinctively. Start by incorporating simple drills: stand on one leg while brushing your teeth, first on the floor, then on a folded towel or cushion to mimic the feel of tussocky grass common in UK fields. This simple act forces the hundreds of stabiliser muscles and nerves in your feet and ankles to fire constantly.
As you gain confidence, you can move on to more dynamic, running-specific movements. Instead of running on the smooth tarmac of the park path, deliberately run along the uneven grass verge. Use kerb edges for balance drills, walking along them like a tightrope to fine-tune your stability. These micro-adjustments are direct simulations of navigating the cambers and uneven footing of a real race course.

This image perfectly captures the essence of urban proprioception training. The focus is on the contact point between your shoe and an unstable surface. By performing single-leg stances and calf raises on surfaces like this, you are building the specific strength needed to handle the rugged, unpredictable terrain of a British cross-country course. This isn’t just an exercise; it’s forging ankle armour.
Consistency is key. A few minutes of these drills each day will build a level of resilience that no amount of pure strength training can replicate. It’s the secret weapon that will keep you upright and moving forward while others are faltering.
Why You Should Ignore Your GPS Watch Pace During a Cross-Country Race?
For the modern road runner, the GPS watch is a sacred tool. It dictates pace, measures effort, and validates performance. In cross-country, it’s a liability. The single biggest mental adjustment a city runner must make is to unchain themselves from the tyranny of pace-per-mile. On a course with steep climbs, energy-sapping mud, and sharp turns, your GPS pace is a meaningless, anxiety-inducing number. A 9-minute mile in deep mud could be a harder effort than a 6-minute mile on the flat. Pacing in cross-country is about effort, not numbers.
This philosophy is central to the sport’s culture. As legendary coach Pete Magill states, it’s a discipline dictated by feel. This is a critical insight for anyone coming from a world of predictable splits and even pacing.
Cross country is largely dictated by effort or feel of pace as there are no splits, so pacing is of utmost importance during the race
– Pete Magill, Runner’s World UK Cross-Country Training Guide
In the fiercely competitive world of English club league races, this principle is taken to its logical conclusion. Success is rarely about personal best times; it’s about finishing position and scoring points for your team. Runners engage in ‘man-marking,’ focusing entirely on the competitors around them. Your goal is to stay with, or pass, a rival, not to hit a certain pace. The best runners learn to gauge their effort using internal metrics: their breathing cadence (e.g., a ‘3 steps in, 3 steps out’ rhythm), their heart rate feel, and the level of burn in their legs. These are the true data points of cross-country.
So, cover up your watch face on race day. Learn to listen to your body. Focus on the back of the vest in front of you. Your race will be defined by your grit and competitive instinct, not by a satellite signal struggling to make sense of the beautiful chaos around you.
How to Wash Mud-Caked Running Shoes Without Destroying the Glue?
The aftermath of a proper UK cross-country race is a beautiful, muddy disaster. Your shoes, once brightly coloured, are now unrecognisable lumps of caked-on earth. The temptation is to blast them with a hose or, worse, throw them in the washing machine. Resist this urge. Aggressive cleaning methods, along with direct heat, are the fastest way to destroy the adhesives that hold your expensive running shoes together, leading to delamination and a drastically shortened lifespan.
Mastering the art of ‘mud-craft’—the post-race cleaning ritual—is a vital part of being a cross-country runner. The first step, ideally done at the race venue, is to bang the shoes together to dislodge the worst of the mud. Back home, your approach should be patient and methodical. Stuff the shoes tightly with scrunched-up paper towels (which are more absorbent and don’t risk ink bleeding like newspaper) to draw out internal moisture and help them keep their shape. Then, let them dry naturally until the mud is hard and brittle. Crucially, avoid placing them on a radiator or in front of a fire; the intense, direct heat is what melts the glue.
Once the mud is dry, use a stiff brush to scrub it off. For the final clean, use a specialised product like Nikwax Footwear Cleaning Gel and a damp cloth, which are designed to clean technical fabrics without damaging them. The real secret of the seasoned UK runner is the “car boot kit”: a sturdy ‘bag for life’ containing a stiff brush, an old towel, and a 2-litre bottle of water. This allows for an immediate, on-site pre-clean that makes the job at home ten times easier.

This setup is the reality of the sport. It’s not glamorous, but respecting this process ensures your gear lasts the season. Treating your equipment with care is a discipline that reflects the respect you have for the sport itself. Proper cleaning preserves the integrity of your shoes, ensuring the grip and support you rely on are there for the next battle.
This ritual is as much a part of the cross-country experience as the race itself. It’s a quiet moment of reflection on the effort you’ve just put in, and a practical step in preparing for the next one.
The Warm-Up Mistake: Why You Get Cold on the Start Line?
The scene is a familiar one at any cross-country event in the UK: a field of hundreds of runners, huddled together, shivering in their club vests as they wait for the starting gun. Many of them will have just completed a 15-20 minute warm-up jog, yet they are already cold. This is the classic warm-up mistake, born from a misunderstanding of the unique environment of a mass-start, cold-weather race.
A warm-up has two goals: to prepare the muscles for intense effort and to raise core body temperature. The problem is that after your warm-up jog, you are often corralled into a starting pen for 10, 15, or even 20 minutes before the race begins. During this static period, your body rapidly loses all the heat it just generated. You start the race with cold, unresponsive muscles, increasing your risk of injury and ensuring the first mile is a miserable, sluggish experience.
The solution is to change your timing and your attire. Your warm-up should finish as close to the race start as possible. But more importantly, you must wear disposable outer layers right up until the final minute. The UK cross-country season, which typically runs from October to February, presents highly variable weather conditions, making this strategy essential. An old long-sleeved t-shirt, a bin bag with holes cut for your head and arms, or cheap charity-shop jumpers are the uniform of the savvy starter. These layers trap your body heat after your warm-up, keeping your muscles primed and ready.
In the final minute before the gun, you discard your outer layers to the side (most races collect these for charity). You will be one of the few runners on the line who is genuinely warm, mentally composed, and physically ready to explode into action from the very first step. It’s a small detail that makes a massive difference.
Footpath vs Open Access Land: Where Can You Legally Walk?
For the city-based runner, finding any elevation can feel like a quest. But before you start trespassing on the nearest grassy slope, you need to understand the rules of engagement in the British countryside. Knowing where you can legally run is fundamental. The UK has a fantastic network of public rights of way and, thanks to the Countryside and Rights of Way (CRoW) Act 2000, vast areas of ‘Open Access Land’.
Your most important tool in this quest is an Ordnance Survey (OS) map, either physical or through their app. Public Footpaths (where you can walk and run) are marked with green dashed lines, while Bridleways (which also permit cyclists and horse riders) are marked with longer green dashes. These paths are your legal highways through the countryside. More exciting for hill training, however, is Open Access Land, typically covering mountains, moors, heaths, and downs. These areas are marked on OS maps with an orange border or shading, and within them, you are legally free to roam away from the marked paths, allowing you to find your own climbs and create your own training loops.
For a London-based runner, this knowledge is transformative. A short train journey on the TFL network can take you to the Surrey Hills or the Chilterns, both designated Areas of Outstanding Natural Beauty (AONBs). These areas are crisscrossed with public footpaths and contain significant pockets of Open Access Land, providing all the challenging terrain you need. Before you go, use online tools like DEFRA’s ‘Magic Map’ to double-check the boundaries and be aware that access rights can sometimes be restricted seasonally, for example during bird nesting season.
Here’s how to use these tools for your hill-hunting missions:
- Use OS Maps to identify ‘Open Access Land’ marked with orange borders.
- Check DEFRA’s ‘Magic Map’ online tool for the most up-to-date legal training routes.
- Learn to distinguish between Public Footpath and Bridleway symbols on your map.
- Plan your logistics: Use the TFL or National Rail network to reach destinations like the Surrey Hills or Chilterns from major cities.
- Always verify access rights, as some areas may have seasonal closures (e.g., during ground-nesting bird season).
By combining map reading with the public transport network, you can transform a weekend into a highly effective hill training camp, leaving you better prepared and more confident for race day.
Zone 2 Cardio: Why Brisk Walking Is Enough for Heart Health?
While the title of this section mentions heart health, for our purposes, we’re going to reframe it. For the flat-land runner, “brisk walking” isn’t just for general fitness; it’s a code word for a highly specific and potent form of hill training. When combined with a steep incline, a powerful, brisk walk becomes a high-intensity muscular endurance session that builds climbing-specific strength without the high impact of running. This is your secret weapon for building an “engine” on the flat.
The most accessible way to do this is on a treadmill. Forget trying to run up a 15% incline; you’ll exhaust yourself in minutes. Instead, set the treadmill to its maximum incline—ideally, using a 12-15% treadmill incline effectively simulates the muscular endurance required for climbing. Now, set the speed to a brisk walk (perhaps 3-4 mph). Within minutes, your heart rate will be in Zone 2 or even Zone 3, your glutes and calves will be on fire, and you’ll be breathing hard. This is hill training. You are building the exact muscle fibres and aerobic capacity needed to power up a muddy slope, but in a controlled, low-impact environment.
You can also apply this principle outdoors. A weekend trip to a future race location, like the Peak District, offers a perfect opportunity for this type of training. Instead of trying to run the whole course, ‘recce’ it at a powerful walking pace. This strategy, common among elite ultrarunners, achieves two goals at once. Firstly, you are getting a brilliant Zone 2 workout that builds specific endurance. Secondly, you are memorising the course: the location of the major climbs, the tricky descents, the best lines through a muddy field. This reconnaissance is invaluable and gives you a huge psychological advantage on race day.
By separating the act of building climbing strength (power walking on inclines) from running fitness (your regular flat runs), you can create a more powerful and resilient athlete, ready to attack the hills when race day comes.
Key Takeaways
- Mastering UK cross-country is less about hill simulation and more about building resilience to chaotic, uneven terrain.
- Your most important gear choices are spike length (12-15mm for mud) and disposable layers for the start line.
- True pacing is done by effort and competition, not by your GPS watch, which is effectively useless.
How to Hike in the Cotswolds AONB Without Contributing to Erosion?
As a runner using the countryside for your training, you have a responsibility to be a custodian of the very trails you enjoy. The principles of not contributing to erosion, often discussed in the context of hiking, are even more critical for runners who cover more ground and can have a higher impact. When you head out for those precious hill sessions in places like the Cotswolds or Surrey Hills, you are a guest in a fragile environment. Adopting a ‘leave no trace’ ethos isn’t just good manners; it’s essential for the long-term sustainability of the sport.
One of the most important, and counter-intuitive, principles is to run through the mud, not around it. When runners (and walkers) skirt the edge of a puddle or muddy patch, they widen the trail, trample sensitive vegetation, and create an even larger problem area over time. A good pair of spikes or trail shoes is designed for mud; trust your gear and stick to the established path. Use tools like OS Maps or apps like Komoot to find less-trodden alternative climbs, spreading the load away from the most popular ‘honeypot’ routes.
Furthermore, you can actively contribute to the places you train. As Trail Conservation UK highlights in the Cotswolds AONB Management Guidelines, training during the off-peak seasons has a double benefit.
The Off-Season Advantage: planning hill training weekends during autumn and winter is not only better for conservation but provides more realistic race simulation on wet, muddy English terrain
– Trail Conservation UK, Cotswolds AONB Management Guidelines
This approach benefits the environment and your training. You can also make a positive economic impact by supporting local pubs, cafes, and B&Bs on your training weekends. Considering a donation to organisations like the National Trust or the Ramblers, who actively work on trail maintenance, is another way to give back. Running with respect ensures these beautiful landscapes remain for future generations of athletes.
Your Action Plan for Responsible Trail Training
- Commit to the path: Always run through muddy sections, not around them, to prevent trail widening and erosion.
- Explore alternatives: Use OS Maps and route-planning apps to find and use less popular trails, spreading your impact.
- Train seasonally: Plan your key hill training weekends during autumn and winter for more realistic race simulation and less impact on dry, busy summer trails.
- Support local economies: When you travel for training, spend money at local businesses like cafes, pubs, and B&Bs to contribute positively.
- Give back directly: Consider making a donation or becoming a member of organisations like the National Trust or the Ramblers who fund and perform vital trail maintenance.
Ultimately, becoming a true cross-country runner means embracing the mud, the effort, and the responsibility that comes with it. By applying these practical strategies, you can transform from an apprehensive city runner into a confident and formidable competitor, no matter how flat your home turf is.