
Achieving that £300/year saving with smart zoned heating isn’t about the thermostat you buy, but about overcoming the hidden technical hurdles in your older UK home.
- Your boiler’s ability to ‘modulate’ (run at variable power) is more important than the brand of smart TRV you choose.
- Radiator valves over 15 years old are a primary point of failure and may need replacing for smart heads to work.
- Standard Wi-Fi often fails to penetrate the thick brick walls of Victorian properties, making other protocols essential.
Recommendation: Audit your existing system’s compatibility—from radiator valves to boiler protocol—before you invest a single pound in smart heating technology.
The familiar roar of the boiler kicking in to heat your entire four-bedroom house, just so you can be comfortable in the living room, is the sound of money being wasted. Every homeowner knows the frustration of heating empty bedrooms, a chilly home office, or a guest room that’s unoccupied 95% of the time. The promise of smart zoned heating—controlling each room’s temperature from your smartphone—seems like the perfect modern solution. Brands like Tado, Nest, and Hive market a simple plug-and-play future where savings are effortless.
However, for those living in the UK’s diverse housing stock, especially older properties like Victorian or Edwardian terraces, the reality is often more complex. The standard advice to simply “install a smart thermostat” overlooks the critical challenge of systemic integration. The real key to unlocking significant savings lies not in the shiny new app, but in ensuring the new technology can effectively communicate with your home’s legacy hardware. These hidden constraints, from boiler communication protocols to the very pipes in your walls, are where most smart heating projects fail to deliver on their promise.
This guide moves beyond the marketing hype. We will act as your virtual smart home integrator, walking you through the essential technical checks that determine success or failure. We’ll explore why a 20-year-old radiator valve might be your biggest obstacle, how your boiler’s ‘modulation’ capability is the secret to efficiency, and which wireless signals can actually penetrate those stubborn Victorian brick walls. By understanding these pitfalls upfront, you can build a truly intelligent system that not only provides comfort but delivers tangible savings of £300 or more a year.
To navigate this complex topic, this article breaks down the essential considerations into clear, manageable sections. Discover the crucial compatibility checks, technical decisions, and user habits you need to master for an efficient smart-zoned home.
Summary: Your Roadmap to an Efficiently Zoned Home
- TRVs and Compatibility: Can You Fit Smart Heads on 20-Year-Old Radiators?
- Modulation: Why Your Old Boiler Might Not Work Efficiently with Tado or Nest?
- Z-Wave vs Wi-Fi: Which Protocol Penetrates Victorian Brick Walls Best?
- The Geofencing Mistake: Why Your Heating Turns Off When You Are Still Home?
- Frost Protection Mode: How Low Can You Set the Temperature Without Burst Pipes?
- Solar PV for Landlords: Is It Worth the Investment if Tenants Pay the Bills?
- Smart Roads: Why Autonomous Cars Need 5G and Better Line Markings?
- How to Reach EPC Rating C for a Victorian Terrace for Under £10,000?
TRVs and Compatibility: Can You Fit Smart Heads on 20-Year-Old Radiators?
Before you even think about brands or features, the first and most critical hurdle is physical compatibility. A smart radiator thermostat (smart TRV) is only as good as the valve it sits on. These smart heads replace the manual, numbered heads on your existing Thermostatic Radiator Valves. The good news is that manufacturers have worked to standardise fittings. For example, a leading brand like Drayton confirms its smart TRVs are designed to fit 90% of UK valve bodies, typically using the common M30 x 1.5mm thread.
The problem, however, often lies with the age and condition of the underlying valve body. If your home has radiators that are 15-20 years old, the TRVs may be worn, stuck, or simply incompatible with modern adapters due to inconsistent manufacturing standards over the years. According to guidance from The Smart Thermostat Shop, TRVs over 15 years old should be considered for replacement as their internal pins and springs may no longer function correctly, preventing the smart head from accurately controlling water flow. Forcing a new smart head onto a faulty old valve is a recipe for failure; the room will either overheat or remain cold, defeating the entire purpose of zoning.
This is a job most competent DIYers can handle. You don’t need to be a plumber to check your valves, but you do need to be methodical. Determining your valve type is the first step towards a successful installation. The checklist below provides a clear, step-by-step process to audit your existing hardware before you spend any money.
Your Action Plan: Checking Radiator Valve Compatibility
- Expose the Valve Body: Carefully unscrew and remove the existing plastic TRV head. This will usually reveal a metal valve body with a small pin in the centre.
- Identify the Design: Observe how the head was attached. Is it a screw-on design (threaded) or a click-on/push-fit mechanism? The vast majority of modern smart TRVs are designed for threaded valves.
- Measure the Diameter: Use a ruler or callipers to measure the diameter of the thread on the valve body. A 30mm diameter almost always indicates the standard M30 fitting, while 28mm points to an M28, which will require an adapter.
- Confirm the Thread: If you are unsure, you can purchase a cheap thread gauge online or take a clear, well-lit photo of the valve and compare it to manufacturer compatibility guides.
- Consult the Experts: If in doubt, refer to the smart TRV manufacturer’s website for their compatibility list or consult a qualified plumber to assess and, if necessary, replace the old valve bodies.
Modulation: Why Your Old Boiler Might Not Work Efficiently with Tado or Nest?
Once you’ve confirmed your radiators are ready for smart TRVs, the next crucial link in the chain is your boiler. Many homeowners assume that any boiler will work with a smart thermostat, but this overlooks the most important feature for energy efficiency: modulation. A basic, older boiler operates like a simple light switch: it’s either 100% on or 100% off. When a room calls for heat, the boiler fires up at full power, often overshooting the target temperature, then shuts down completely. This on/off cycling is inefficient and puts stress on the components.
A modern, modulating boiler, by contrast, works more like a dimmer switch. It can adjust its output, running at a low, steady level (e.g., 20% power) to precisely maintain a temperature. This is where the real savings happen. Smart systems like Tado and Nest are designed to leverage this capability. They use advanced digital communication protocols to “talk” to the boiler, telling it exactly how much heat is needed. Without this communication, even the smartest thermostat can only tell the boiler to turn on or off, losing most of its efficiency potential.
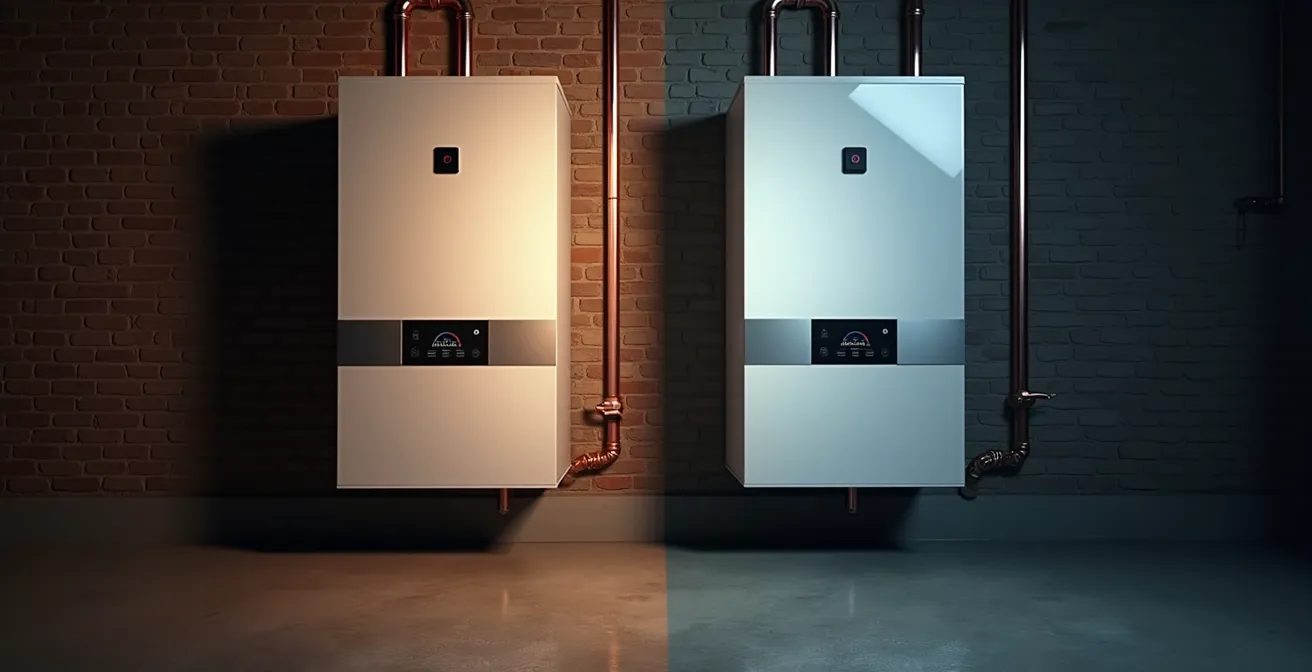
The key is the communication protocol. Different boiler manufacturers use different ‘languages’. This has become more standardised since 2018 with the Boiler Plus regulations, which mandate features like load compensation for all new combi boiler installations in England. However, if your boiler is older, you must check which protocol it supports to ensure it can modulate with a third-party smart thermostat.
The table below, based on expert analysis from The Heating Hub, highlights the protocols used by major UK boiler brands. Check your boiler’s manual or contact the manufacturer to see if it supports an open standard like OpenTherm or a proprietary one like eBUS, and whether your chosen smart thermostat is compatible.
| Boiler Brand | Protocol Support | Smart TRV Compatible | Boiler Plus Compliant |
|---|---|---|---|
| Worcester Bosch | OpenTherm/EMS | Yes (Own brand + third-party) | Yes with load compensation |
| Vaillant | eBUS | Yes (Own brand + third-party) | Yes with load compensation |
| Ideal | OpenTherm | Yes (Most brands) | Yes |
| Baxi | OpenTherm | Yes (Most brands) | Yes |
Z-Wave vs Wi-Fi: Which Protocol Penetrates Victorian Brick Walls Best?
With the hardware sorted, the next technical decision is how your new smart devices will communicate with each other. In a large, four-bedroom house—especially an older one with solid brick internal walls—this is a major consideration. Most consumer-grade smart home devices use Wi-Fi, which is convenient but has significant drawbacks for a robust heating system. Wi-Fi operates on a crowded frequency (2.4GHz) and its ‘star’ network topology means every device must have a strong, direct connection to your router. A smart TRV in a distant upstairs bedroom behind a thick Victorian wall may struggle to maintain a stable connection, leading to missed commands and a cold room.
This is where alternative protocols like Z-Wave or Zigbee offer a superior solution. These protocols are designed specifically for smart home automation. They operate on a lower, less congested frequency (around 868 MHz in the UK) which is better at penetrating solid obstacles—a phenomenon known as lower signal attenuation. More importantly, they create a ‘mesh’ network. Each mains-powered device acts as a repeater, passing signals along. So, a smart plug in the hallway can relay the signal from your central hub to the smart TRV in the back bedroom, creating a resilient and reliable network that covers the whole house.
The importance of getting this right cannot be overstated. A heating system that frequently drops offline is worse than a manual one. As energy experts highlight, the savings are only achievable if the system is reliable. According to analysis from the Energy Saving Trust & British Gas, a well-implemented system delivers significant returns. Their findings in the Smart Thermostat Energy Guide 2023 state:
Smart TRVs can reduce heating bills by 10–20%, while zoning cuts energy use by up to 25% as you only heat occupied spaces.
– Energy Saving Trust & British Gas, Smart Thermostat Energy Guide 2023
However, many UK homeowners face a fundamental plumbing challenge. A comprehensive UK study noted that most older UK homes were built with a single-loop radiator circuit. This means all radiators are on one giant loop of pipe, making true ‘zoning’ (where you could have heating in one zone and hot water in another simultaneously) an expensive and disruptive replumbing job. For most, smart TRVs offer ‘room-by-room’ control when the heating is on, which still delivers the majority of the savings without major plumbing work.
The Geofencing Mistake: Why Your Heating Turns Off When You Are Still Home?
One of the most appealing features of a smart heating system is geofencing. The idea is simple: the system uses your smartphone’s location to automatically turn the heating down when the last person leaves the house and turn it back on as the first person approaches home. In theory, it’s the ultimate ‘set it and forget it’ feature for energy saving. In practice, however, it’s a source of frequent frustration due to common geofencing conflicts.
The classic example in the UK is the “school run problem.” You pop out for 15 minutes to drop the kids at school, a trip that takes you just outside the system’s default geofence radius. The system registers you as ‘Away’ and shuts the heating off. By the time you get back, the house is starting to cool down, and the boiler has to fire up again to bring it back to temperature. This frequent cycling can be less efficient than simply leaving the heating on a low setting. The issue is a geofence radius that is too small for typical daily routines.
Another common mistake is relying solely on geofencing in the age of flexible and remote working. If you decide to work from home on a day you’re usually in the office, a purely location-based system will keep the heating off, leaving you in the cold unless you manually override it. The most effective strategy is not to choose between geofencing and scheduling, but to use a hybrid approach. Use a fixed schedule for predictable times (e.g., a warm house at 7 am for breakfast) and let geofencing manage the less predictable daytime and evening hours. This gives you the best of both worlds: guaranteed comfort and adaptive savings.
Frost Protection Mode: How Low Can You Set the Temperature Without Burst Pipes?
When you’re away from home for an extended period in winter, the goal is to use as little energy as possible. All smart heating systems have a ‘Frost Protection’ or ‘Away’ mode, which sets a minimum temperature to prevent pipes from freezing and bursting—a catastrophic and expensive event. The common mistake is being either too cautious or too reckless. Setting the temperature too high (e.g., 15°C) wastes significant energy, while setting it too low (e.g., 3°C) can be a dangerous gamble.
The universally accepted safe minimum is 5°C to 7°C. However, this is not a one-size-fits-all figure. The risk depends heavily on your home’s construction, insulation levels, and crucially, your location within England. A poorly insulated Victorian house in the Pennines faces a much higher risk than a modern, well-insulated home in Cornwall. The location of your pipework is also a factor; pipes running through an uninsulated loft or along an external north-facing wall are far more vulnerable. When properly configured, smart zoning can lead to a 30% reduction in heating costs, and setting the right frost protection level is a key part of that.

To provide more specific guidance, it’s useful to consider regional climate differences. A house in the milder South West can safely use a lower setpoint than one in the colder North. The following table provides a general guideline for setting minimum frost protection temperatures across different regions of England, highlighting that a single national figure is often inadequate.
This table offers a starting point, but always consider your home’s specific vulnerabilities. If you know you have exposed pipework, it’s wise to be more cautious and consider adding pipe insulation as an extra layer of defence.
| Region | Minimum Safe Temperature | Risk Level at 5°C | Additional Precautions |
|---|---|---|---|
| Cornwall/Devon | 5°C | Low | Standard frost protection sufficient |
| London/Southeast | 7°C | Low-Medium | Check loft pipes |
| Manchester/Northwest | 8°C | Medium | Insulate external walls |
| Yorkshire/Pennines | 10°C | High | Consider pipe trace heating |
Solar PV for Landlords: Is It Worth the Investment if Tenants Pay the Bills?
The question of capital investment for landlords is a tricky one when tenants are the ones paying the utility bills. Large-scale investments like Solar PV can be a hard sell. However, the regulatory landscape in the UK, specifically the Minimum Energy Efficiency Standards (MEES), has changed the calculation. Properties must meet a minimum Energy Performance Certificate (EPC) rating of ‘E’ to be legally let, with future targets pushing towards ‘C’. This is where smaller, more strategic investments come into play.
Instead of a £10,000+ solar installation, a landlord can make a significant impact on their EPC rating with a far smaller outlay on smart heating controls. As a case study by Drayton highlights, a complete Wiser smart zoned heating system can be installed for around £500. This upgrade not only helps meet MEES requirements but also becomes a valuable amenity to attract tenants. The system’s data shows that upgrading from basic radiator controls can yield substantial savings for the tenant, with smart radiator thermostats saving up to 19% on heating costs.
For a landlord, the key is to install a system that provides benefits to the tenant while retaining ultimate control to protect the property and prevent energy waste. A well-configured smart system achieves both. The following points outline a best-practice configuration for a rental property:
- Install with Remote Management: Choose a system that allows you, the landlord, to monitor energy usage and receive alerts (e.g., if the heating is left on full while the property is empty).
- Set Sensible Temperature Limits: Configure a maximum temperature (e.g., 21°C) to prevent excessive energy use and a minimum temperature (e.g., 15°C) to ensure tenant comfort and protect the property from damp.
- Provide Default Schedules: Create logical default heating schedules that tenants can then easily modify to suit their own lifestyle within the preset boundaries.
- Enable Automated Vacation Mode: Ensure the system can automatically activate frost protection when the property is vacant for extended periods.
- Document as an Amenity: Clearly list the smart heating system and its benefits (lower bills, room-by-room control) in the tenancy agreement and marketing materials to justify a competitive rent.
Smart Roads: Why Autonomous Cars Need 5G and Better Line Markings?
The journey towards a truly ‘smart’ home heating system shares a surprising number of parallels with the development of autonomous vehicles. The title of this section might seem out of place, but the analogy is powerful. Just as a car can have different levels of driver assistance, from simple cruise control to full self-driving, heating systems have a clear hierarchy of automation. Understanding where your system sits on this scale helps you understand what to expect from it and what your role as the ‘driver’ is.
A basic manual system is Level 0—you are in full control. A simple programmable thermostat that follows a fixed schedule is Level 1. Most people entering the smart home world start at Level 2, with a smart thermostat like Nest that ‘learns’ your habits but still requires your input. The true goal of this article—a fully zoned system with smart TRVs—is Level 3 automation. Here, the system manages individual rooms automatically based on set preferences, but you are still the one who sets those preferences and defines the zones.
The future, much like in the automotive world, points towards Level 4 and 5 systems. These AI-optimised systems will not only react to your presence but will predict your needs based on weather forecasts, your calendar, and even real-time energy tariffs. They will self-diagnose faults and require minimal human oversight. While this might seem like science fiction, it’s the logical endpoint of the technology we’re installing today. The table below, inspired by the levels of vehicle autonomy, clarifies this progression.
Thinking about your heating system in these terms helps manage expectations. A Level 3 system is a powerful tool, but it is not fully autonomous; it still requires thoughtful setup and occasional oversight from you to perform at its best.
| Level | Heating System Type | Automation Features | User Input Required |
|---|---|---|---|
| Level 0 | Manual TRVs | None | Full manual control |
| Level 1 | Programmable Thermostat | Basic scheduling | Programming schedules |
| Level 2 | Smart Thermostat | Learning + remote control | Initial preferences |
| Level 3 | Smart Zoned System | Room-by-room automation | Zone preferences |
| Level 4 | AI-Optimized System | Predictive, weather-aware | Minimal oversight |
| Level 5 | Fully Autonomous | Self-learning, self-maintaining | None |
Key Takeaways
- True savings come from integrating smart tech with your home’s existing, often old, hardware, not from the app alone.
- Your boiler’s ability to ‘modulate’ its power output is the single most important factor for efficiency.
- For older UK homes with thick walls, mesh networks like Z-Wave are technically superior to standard Wi-Fi for reliability.
How to Reach EPC Rating C for a Victorian Terrace for Under £10,000?
For many homeowners, especially those in older housing stock like the classic Victorian terrace, the end goal is not just about comfort or saving a few hundred pounds a year. It’s about future-proofing the property’s value and meeting increasingly stringent government energy standards. The target for many is achieving an Energy Performance Certificate (EPC) rating of ‘C’, which can seem like a daunting and expensive task requiring tens of thousands in major renovations.
However, a strategic, layered approach can get you there for a fraction of the cost. The secret is to focus on the most cost-effective improvements first. While comprehensive insulation and new windows are impactful, they are also incredibly expensive. A far more accessible starting point is upgrading your heating controls. As testing from the consumer champion Which? has shown, smart radiator valves are a proven method to save energy by allowing granular, remote control over individual room temperatures. Their findings demonstrate that when used well, these systems deliver on the promise of bill reduction.
The most powerful strategy for a Victorian terrace is to combine this relatively low-cost heating upgrade with basic, high-impact insulation measures. Instead of spending £10,000 on external wall insulation, you can achieve a significant jump in your EPC rating by pairing a smart zoned heating system (costing around £500-£800 for a 4-bed house) with loft insulation (approx. £500-£900) and draught-proofing (approx. £200). This combination, costing well under £2,000, tackles both how heat is generated and controlled, and how it is retained. It represents the “low-hanging fruit” of energy efficiency and is the smartest first step towards reaching that coveted ‘C’ rating without breaking the bank.
By systematically addressing hardware compatibility, understanding your boiler’s capabilities, and adopting smart user habits, you transform zoned heating from a hopeful purchase into a high-performance system. This is how you achieve real control and unlock those £300+ annual savings, turning your 4-bedroom house into a truly smart and efficient home.
Frequently Asked Questions About Smart Zoned Heating
Why does my heating turn off during the school run?
Your geofence radius may be too small. Increase it to 200-300 meters to account for typical UK school run distances without triggering ‘Away’ mode.
Can I combine scheduling with geofencing?
Yes, use a hybrid approach: set morning heating (7am-9am) on a fixed schedule, then use geofencing for the rest of the day to adapt to varying routines.
What about work-from-home days?
Create a ‘Home Office’ schedule that overrides geofencing on specific weekdays, maintaining comfort without relying on location tracking.